How to create a Jira issue automatically upon a DSS scenario execution failure

Scenario executions within Dataiku DSS are a key part of operationalization (o16n), and your organization may have many of them running every day. If you are using Jira to organize your support flow, you may want to have an issue automatically created when a scenario fails.
One way of doing this is to set up Dataiku DSS to send an email upon scenario failure, and then ingest this email in Jira using a mail handler.
An alternative we will showcase here is to use the Jira REST API. To be more specific, we use the /rest/2/api/issue endpoint. This is a POST request, and we will need to provide the issue details in the body as JSON.
Prerequisites
You need to have a DSS node installed and an instance of JIRA running (be it Cloud or On-Premise).
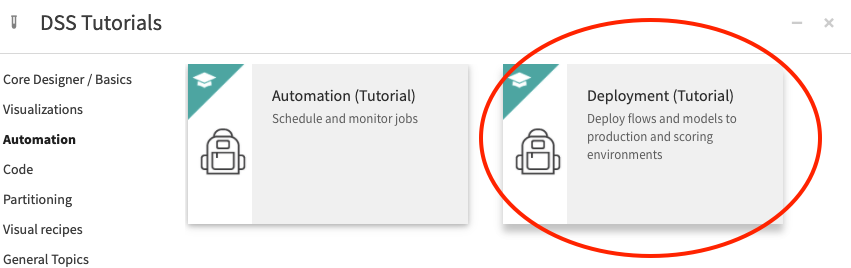
In Dataiku DSS, you can use the tutorial project called “Deployment (Tutorial)”:
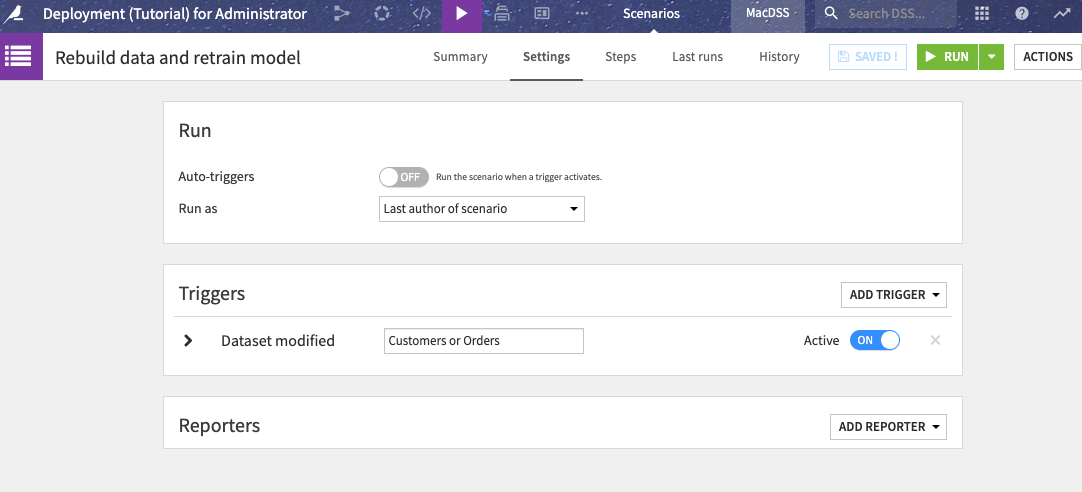
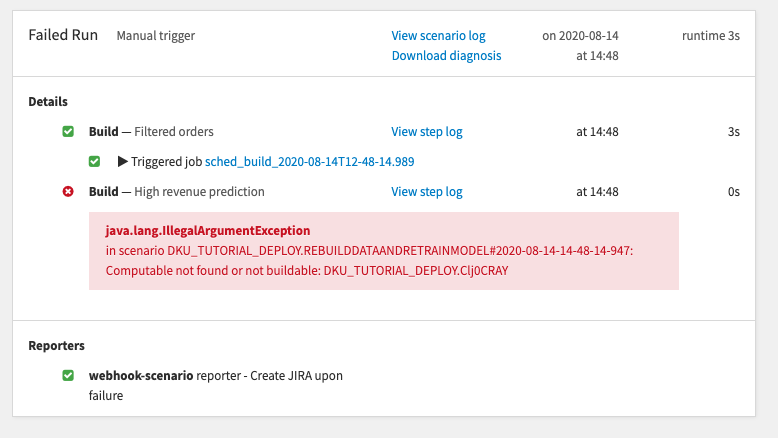
In this project, we already have a scenario:
We are all set from the Dataiku DSS side of things.
Now for Jira. We need to have a project at hand with a user allowed to create issues in it. In order to be authenticated with the JIRA REST API, we will also need an API token. You can check this page to see how to generate one.
This token is not what we should use directly for authentication as stated in Basic auth for REST APIs. We need an encoded version of it.
For that, you can run this unix command:
echo -n <your jira user email>:<your api token> | base64
You will retrieve a string that you need to store and use in the header setup below.
Setup
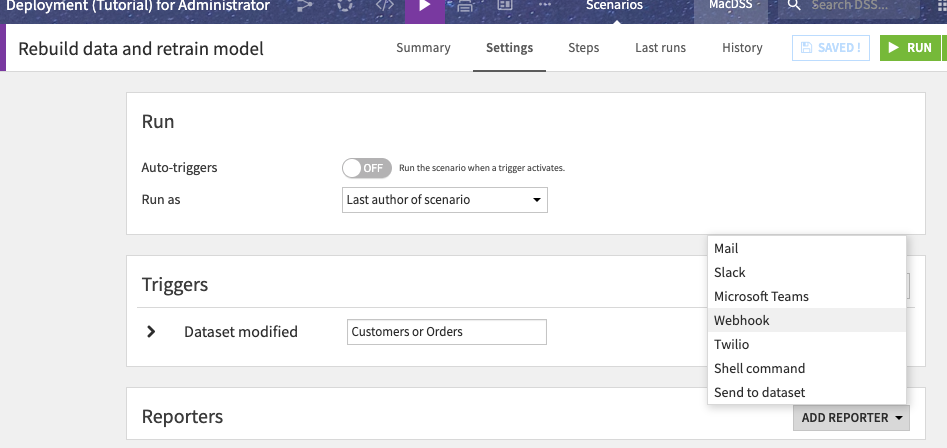
In the scenario, you need to add a Reporter of type "Webhook" in the Settings tab:
Now let’s set it up:
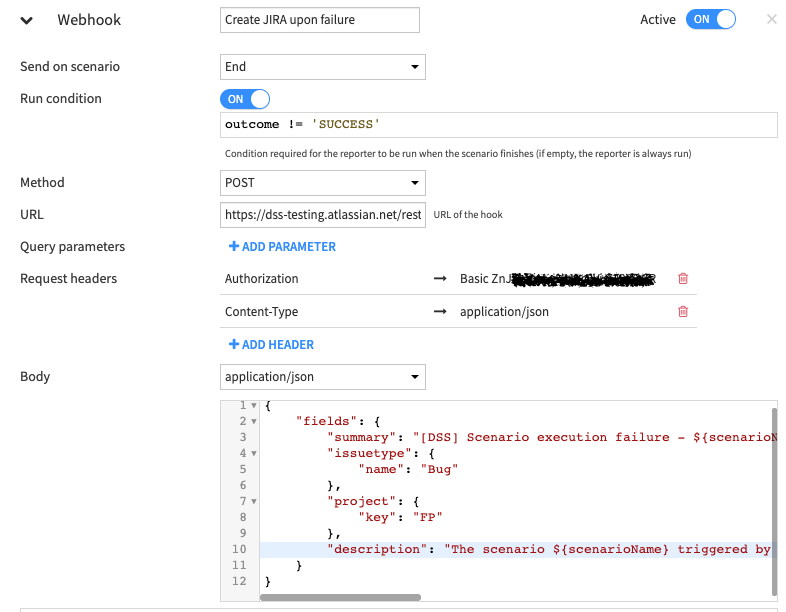
- Enter a meaningful name such as "Create JIRA upon failure".
- Leave the Send on scenario to End.
- The default Run condition is good as it will be executed if the outcome is not a success.
- The method will be POST.
- As a URL, you need to put https://<your instance url>/rest/api/2/issue (e.g. https://dataiku.atlassian.net/rest/api/2/issue for a cloud instance)
- Now, you need to add 2 headers:
- One named Authentication with value Basic <your_base64_encoded_token>
- Another named Content-Type with value application/json
- As request body, you can paste the following as a starter:
{
    "fields": {
        "summary": "[DSS] Scenario execution failure - ${scenarioName}",
        "issuetype": {
            "name": "Bug"
        },
        "project": {
            "key": "FP"
        },
        "description": "The scenario ${scenarioName} triggered by ${triggerName} (${triggerType}) has failed. \nStep to fail was: ${firstFailedStepName}\n\nYou can check the scenario log at ${scenarioRunURL}"
    }
}
Let’s explain the content here so you can customize it:
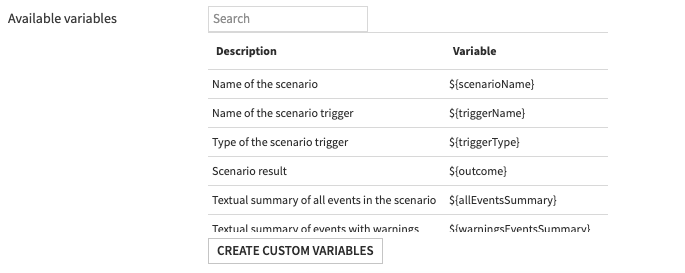
- We start by specifying the issue summary. Note we are using scenario variables to make the title clearer. You can find a list of available variables on the screen below the body field.
- We then tell Jira to create an issue in the project with key FP and with the issue type named "Bug". You can of course change this to match your JIRA instance setup.
- The last field we enter is the description where we put enough information for the Jira reader to understand what is wrong.
We are now ready to test by executing the scenario. As you imported the tutorials without running it, the scenario will fail, but the webhook will be executed.
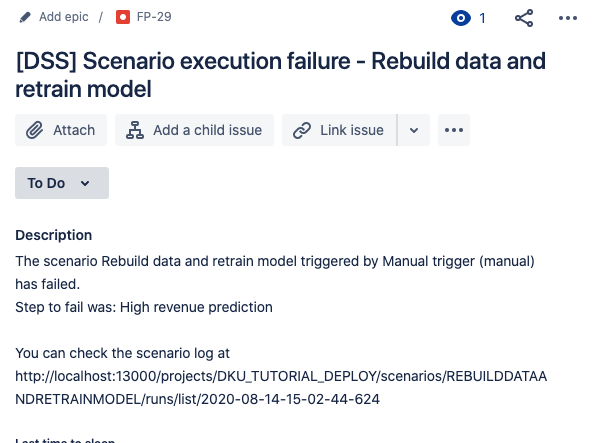
You can now log in to your JIRA instance and check for the issue:
Next
You can now enrich your JIRA with more data using all the options offered by the JSON body as described in the endpoint detail: The Jira Cloud platform REST API
You can also add more information from Dataiku DSS, on the scenario, the project of the failure using the Scenario variable, or even building your own string using Custom Variables.
Further Resources
For more information about automation scenarios in Dataiku DSS, please consult the relevant sections of the reference documentation or the Dataiku Academy for hands-on tutorials on automation.